

Do you use Interactive Notebooks in your class? I first heard of this teaching tool about ten years ago when I had the opportunity to attend an Avid two-day training. The teacher who taught the class was an AP science teacher. While teaching us the ins and outs of the notebook, he also brought in notebooks from students in his science classes as well as examples in history class. As I went home that afternoon, I thought about how I could use this tool in an English classroom. The student notebook examples I saw were filled with detailed Cornell notes, worksheets, and Avid’s famous LSAs (left-side activities). Even looking online for examples, I found ELA at the middle and high school level much to be desired.
That fall, I decided to just launch the notebook and try to use it how I normally teach class. And I have to say, I wish I had tried this sooner. Everything that I thought could/would go wrong, never did, and I had so much more buy-in and participation than traditional teaching. I will never go back to the way I used to teach. Why? Because…
- You use the notebook every day, so students don’t lose it. (I have had only 4 students in the ten years I’ve been doing this actually lose theirs. We just rebuilt it. A few leave it in their writing folder in the classroom if losing it becomes an issue.)
- Since you use the notebook every day, students bring it to class everyday.
- You can easily check understanding without taking work home.
- Students have their work in one location, so things don’t get lost.
- Once the notebook is set up, it works easily in the classroom and is adaptable to how you teach and run your class.
So, if you haven’t tried this, I highly recommend it! I am going to walk you through my notebook, using examples from high school (which I used to teach) and middle school (which I currently teach), so hopefully it’ll give you some ideas on how to set it up and structure yours.

First of all, you need a class notebook. This NEVER leaves the classroom (as you may not get it back and have to build a new one!). At the beginning of the school year, set up your notebook while the students are setting up theirs. This also helps students see what to do when they’re absent. You will build and work along with the students as they work through theirs.
Setting Up
I use a 100-page small composition notebook, the ones you can get for $1.oo, but I have had students use spiral notebooks. The downside of spirals is that the pages can tear out easily, so this usually leads to annoyance and frustration. Make sure whatever page-length and/or style you use that you tell your students to purchase the same. I found out the hard way that some composition notebooks come with less than 100 pages (I thought 100 was the only length) and had students who had to start a new notebook later in the year because they didn’t have enough pages.
Numbering the Pages and Completing the Table of Contents Pages

Setting up the notebook takes the longest time. In my class, this means a good 90 minute period to complete. Have students number each page on the bottom outside corner. (In my notebook, I number the top too, so students can see what page I am on when I display it with the document camera.) Page 1 is a cover page, where I have them draw or find art that represents who they are, what English means to them, and who supports them. The Table of Contents Pages take up pages 2-3. On these pages, students write the title, along with the corresponding page number and number of stamps (see grading the notebook below).
The actual work for students begins on page 4. This page I have students tape in the syllabus, so it’s easy to find and reference. Students number the pages until they get to 101. If we go over 100 pages in the year, then we number it as we go along then. Using the Avid system, every right page is an odd number and every left page is an even number.
I have a reference section in the back, along with a vocabulary section (called STEMs, as it’s prefixes, suffixes, and root words–see reference pages below). Over the years, my reference section has became smaller and smaller. This year, it’s only 12 pages. The vocabulary section is bigger, as students learn 50 prefixes, suffixes, and root words each trimester, so I have 32 pages for that section.
Reference Pages

In the back of the notebook, I have resources for students to refer to during the year. These are handouts that students review, reference, or write in. It’s a handy-dandy reference for them without having to look throughout their notebook. The reference section is its own, so it begins with R1, R2, etc. (R for reference.) Below is an example of high school students keeping track of their independent reading books.
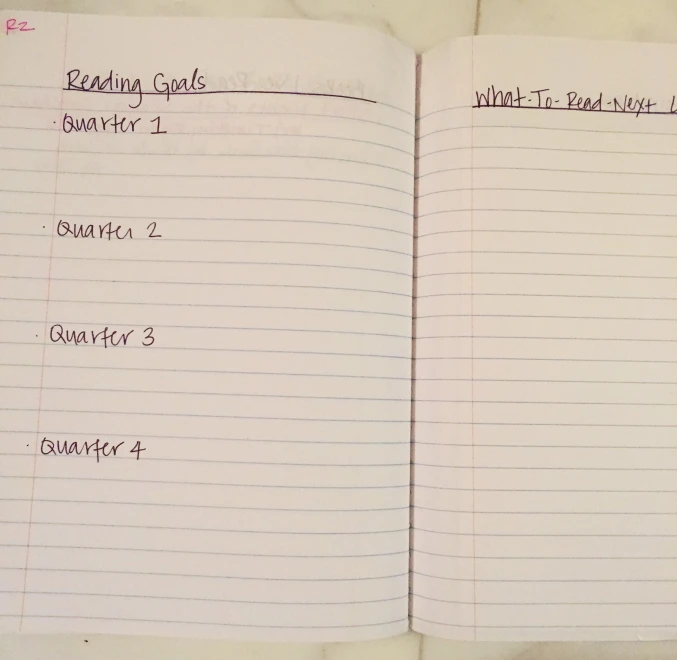
Below is an example of middle school students keeping track of their independent reading books.

Have all the reference pages copied and ready to go, because students have to cut and tape or glue the reference pages in. (As I said, this takes a long time to do.)

For vocabulary, I number it but put a V in front, so they know they are in the vocabulary section (V1, V2, etc.) Every Monday students are working through STEMs, whether that be learning the 10 new words or completing a creative write activity with it. It’s all numbered out and students fill it in as the year goes on. If you’re interested in what I do, you can find the resource here.

Divider Tabs

I used to use post-its within the pages as tabs for each unit we work on in class. (See photo above.) However, two years ago, I developed a page with a tab, copied on cardstock, so it works better and is sturdier than a post-it. You can find the link for this resource here.

This is what the class notebook looked like at the end of last year. The tabs going down were the major units. You can see the Table of Contents Page too.

Grading

As I lesson plan, I fill out the page(s) that I want the students to complete. Sometimes it’s notes. Sometimes it’s plot questions. Sometimes it’s a partner activity. The whole point of the English notebook is for students to keep important information (notes, handouts, worksheets, etc.) and practice concepts in a low-stakes environment. I try to keep with the AVID concept of teacher notes on the right, student work on the left, but it doesn’t always work out that way. The true AVID way uses all teacher notes on the right and LSAs (left-side activities) on the left, but many of the LSAs were really hard to incorporate into an English classroom, so I abandoned it after a few lessons. Once I have decided what goes on each page, I decide how many stamps I want to assign it. (The stamps equal points, which in turn equals a grade when it is turned in.) I bought this really cool stamp from Office Depot and have a different color for each grade level I teach and a different stamp I rotate for each quarter. At first I thought high school students wouldn’t care about a silly stamp, but they do. Maybe it’s the clicking noise it makes that drives them to make sure everyone knows they did their work, I don’t know. The beauty of the stamp is:
- You don’t have to read EVERYTHING. Since it’s homework and classwork, not large essays and assignments, skimming the work is just fine. I usually look at one question or concept before stamping. (For example, we just spent a few days discussing how to blend quotes. I can easily look at the beginning of the quote to see if it was done and punctuated correctly. If not, I talk about the mistake, or what is missing, right there. I walk away and then come back a little later to see it fixed. If it is, then the stamp. If not, I have a short conversation to go over the mistake and make sure the student understands. Then I stamp it.)
- If the student didn’t complete all the work, I don’t give all the stamps. I do, however, award all the stamps once they complete the work and it is quality.
- If a student is absent, he/she can find the class notebook, do the work, and show me at a later date to receive the full stamps for the page(s).
- Stamps equals points. Not all pages are the same points–it all depends on how much work/thought goes into each page.
- Once you know what you’re looking for, it takes 3-5 minutes at most to go around the room and stamp 30 notebook pages. I usually have the students work on something while I go around and check their notebooks so they don’t sit around.
- Students know how many stamps each page is worth because they fill out the Table of Contents before turning to whatever page for the day. I put small dots next to each number in the TOC page for easy reference.
- A student can always come back with the completed page to earn the stamps available with no late penalty charge. However, once the notebook is graded, there is no going back.
- All stamps have to be earned the class period before the notebook is scored. Otherwise, grading the notebook takes WAY TOO LONG, as students are frantically trying to fill out the pages and get the stamps. (I learned this the hard way too.)
At the end of each unit, students fill out the scoring guide, add up the number of stamps, have a partner double-check them, and then turn it in. I grade the notebooks while they are taking their end-of-unit test or essay, and give back to them at the end of the period.
I sometimes grade when students are reading their independent reading book silently. Since I have looked through their notebook stamping as they have completed it, I don’t need to look at it again. I take students at their word and putting in the notebook grade for a class of 30 takes about 10 minutes.
I have writing folders where students keep their essays, independent reading projects, literature assignments, and other tests. The interactive notebook is only classwork/small homework (like answering plot questions in a novel study). If you use this notebook style, I’d love to hear your thoughts and what has worked well in your classroom. Happy teaching!


Leave a comment